Application yml. Thymeleaf 란? status. jar 배포.

++ 환경설정 파일
application.yml vs application.properties
properties와 yml의 대표적인 차이는 내부 구조가 있다. properties의 경우엔 각 줄마다 key=value의 형태로 이루어져 있지만, yml의 경우엔 들여쓰기로 구분되는 계층 구조 및 key: value의 형태로 이루어져 있다.
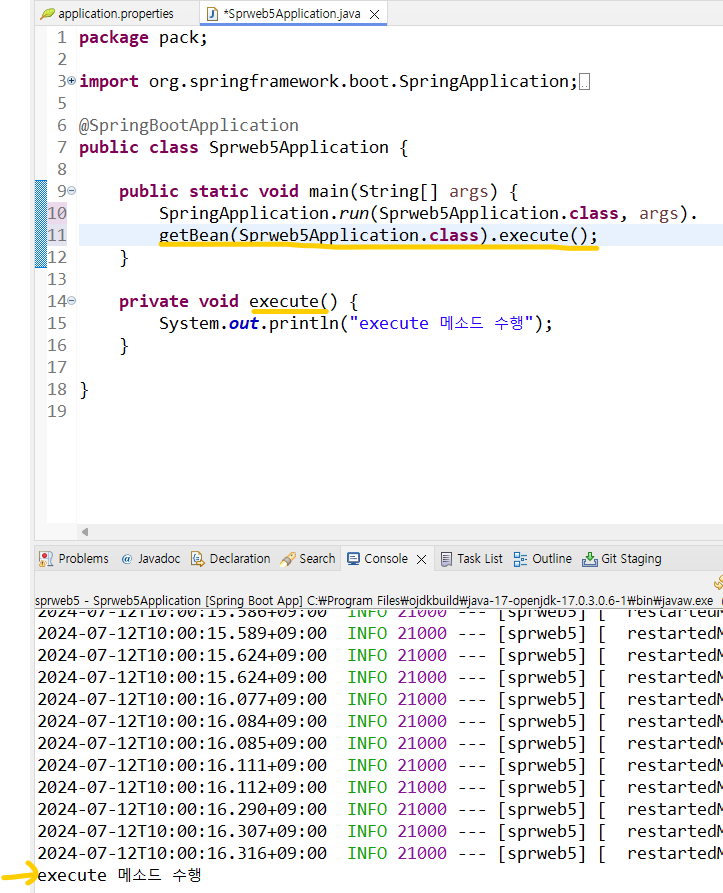
스프링 부트가 돌아가는걸 이렇게도 확인해볼수 있다.
흐름파악하기.
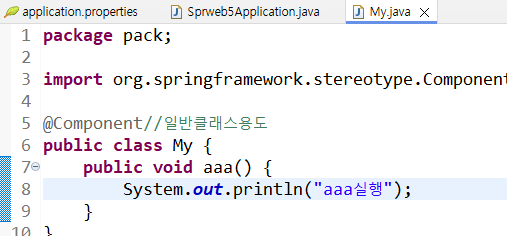
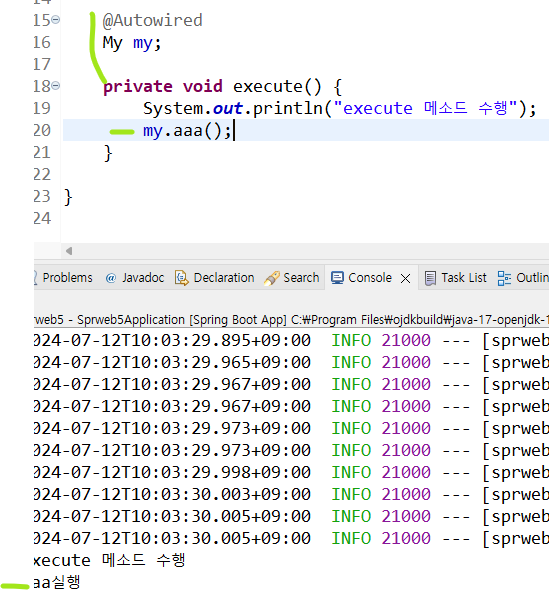
@어노테이션의 흐름을 파악하기 위한 실습이었다. 해당 소소파일은 sprweb5를 참고하면 된다.
https://github.com/yoonah0327/spring_source
GitHub - yoonah0327/spring_source
Contribute to yoonah0327/spring_source development by creating an account on GitHub.
github.com
Thymeleaf
클라이언트 사이드 : html만 파싱가능. 따라서 서버 사이드에서 java 내용출력위해 ,그걸 html로 바꿔서 클라이언트에게 보내준다. 그게 template Engine. 템플릿 엔진 의 한 예시가 지금까지 연습했던 jsp.
템플릿 엔진(Template Engine)이란?
템플릿 양식과 특정 데이터 모델에 따른 입력 자료를 합성하여 결과 문서를 출력하는 소프트웨어(또는 소프트웨어 컴포넌트)를 말한다.
그 중 웹 템플릿 엔진(web template engine)이란 웹 문서가 출력되는 템플릿 엔진을 말한다.
즉, 웹 템플릿 엔진은 웹 템플릿들(web templates)과 웹 컨텐츠 정보(content information)를 처리하기 위해 설계된 소프트웨어이다.
웹 템플릿 엔진은 view code(html)와 data logic code(db connection)를 분리해주는 기능을 한다.
서버 사이드 템플릿 엔진(Server Side Template Engine)
서버 사이드 템플릿 엔진이란 서버쪽에서 템플릿 구성을 하는 방식이라고 생각하시면 이해가 편합니다 🙆🏻
서버에서 DB 혹은 API 에서 가져온 데이터를 미리 정의된 Template에 넣어 HTML 을 그려서 클라이언트에게 전달해주는 역할을 합니다 🔨
이미 정의되어 있는 HTML 코드에 동적으로 생성되는 부분만 템플릿 특정 장소에 끼워넣는 방식으로 동작합니다.

클라이언트 사이드 템플릿 엔진(Client Side Template Engine)
HTMl 형태로 코드를 작성할 수 있으며 동적으로 DOM 을 그리게 해주는 역할입니다.
DOM(Document Object Model) 이란 웹 페이지의 기본 형태인 문서를 객체화한 모델입니다.
즉, 브라우저가 서버로부터 받은 웹 문서(ex HTML)를 랜더링 하여 이해할 수 있는 구조로 구성하여 메모리에 적재하는데 이를 DOM 이라고 합니다

객체화된 DOM 구조를 통해 동일한 웹 페이지라도 다양하게 표현 할 수 있습니다.
이때 클라이언트 사이드 템플릿 엔진은 DOM 객체에 동적으로 그려주는 프로세스를 담당합니다.

템플릿 엔진의 필요성
- 많은 코드를 줄일 수 있다. 기존 HTML 비해서 간단한 문법을 사용합니다.
- 재사용성이 높습니다. 보통 웹페이지는 비슷한 템플릿을 가집니다. 데이터만 바뀌는 경우가 많기에 템플릿을 사용하면
재사용성이 높습니다.
- 유지보수에 용이합니다. 하나의 템플릿을 만들어 여러 페이지를 렌더링 할 수 있습니다.
jsp를 사용할경우, 웹에서 서블릿 배포시 war 쓰게됨.
아파치톰캣등을 설치하고, 이 war를 줘서 , 서비스를 한다.
즉 배포가 너무 불편해진다.
그걸 해결하고자 mustache.
mustache:
html로 바꿔줌. 확장자는 html이지만, 자바를 실행한 결과를 html로바꿧 내보내주는것.
즉 외형만 html인 특수한 파일을 보내주는것.
mustache 에서 한단계 발전한게 thymeleaf.
JSP vs Mustache vs Thymeleaf
| JSP | 서버 지원 템플릿 엔진으로 서버에서 구동한다. 서버에서 Java 코드로 출력자료를 만든 뒤 이 문자열을 html 형식으로 변환해 브라우저로 전달한다. 스프링부트에서는 WAS에 종속적인 JSP를 더 이상 권장하지 않고 있다. 배포시 war 사용. |
| Mustache | 스프링부트에서 공식으로 지원하는 템플릿 엔진으로 Java는 물론, 현존하는 대부분의 언어를 지원한다. - JSP와 같이 html을 만들어주는 템플릿 엔진 - 로직 코드를 사용할 수 없어 View 역할과 서버의 역할을 명확히 분리한다. - Mustache.js와 Mustache.java를 사용해 하나의 문법으로 클라이언트/서버 템플릿으로 모두 사용 가능하다. 배포시 jar 사용. |
| Thymeleaf | 스프링부트에서 공식으로 지원하는 템플릿 엔진. - 스프링 진영에서 적극적으로 지원. |
++
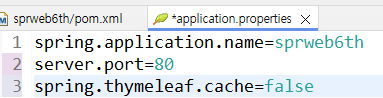
이클립스는 이게 기본값. 비쥬얼스튜디오코드에선 아니여서 비쥬얼스튜디오코드 사용하는 사람들은 설정 요.
👉 spring.thymeleaf.prefix=classpath:/templates/
: 경로를 잡아준다. 예를 들어 'classpath:/templates/'로 설정한 것이 기본 값이다. resources 폴더 밑 templates 폴더가 있고 그 안에 html 파일을 넣어 준다.
👉 spring.thymeleaf.suffix=. html
: html을 사용한다면 '. html'로 설정해 준다. 기본값임. 만일 jsp를 사용한다면 '. jsp'를 입력해주면 된다.
타임리프의 기본값!!!!!

보통 시작하는 html은 static에, 최종적으로 보여주는 html은 template 폴더 위치하게된다.

클라이언트 브라우저가 해석할수 없다.

list1.html
마우스 오른쪽버튼 > open with > web browser
로 list1를 띄워보았다.
msg의 내용을 해석하지 못하고 span영역의 순수html만 출력해냄을 알수 있다.
Sprweb6thApplication.java
run as > spring boot app
타임리프를 통해 서버를 출력해본 결과, msg의 내용을 읽어옴을 알 수 있다.
포워딩임을 주소창에서 확인가.
한문장으로 타임리프는 템플릿엔진이다.
data + template = template engine.
다양한 타임리프 출력코드연습을 기록해둔다.
<!DOCTYPE html>
<html xmlns:th="http://www.thymeleaf.org">
<head>
<meta charset="UTF-8">
<title>Insert title here</title>
</head>
<body>
<h2>🐬타임리프 연습장🐬</h2><br>
메시지 : <span th:text="${msg}">여긴 text영역. 순수 html에만 표시.</span><br>
메시지2 : <b th:text="${msg2}">두번째 메시지</b><br><!-- 타임리프가 수행되면 "msg2", 안되면 "두번째메시지" -->
메시지2: <i>[[${msg2}]]</i><br><!-- 그냥 타임리프가 수행되는것만 -->
값 결합(+ 사용) : <span th:text="'난 궁금해 '+ ${msg2} + ' 누가 이길지'">문자열 더하기</span><br>
값 결합(리터럴 치환) : <span th:text="|궁금해 ${msg2} 누가 이길지|">|문자열| 형태 </span><br>
<br>
지역 변수 처리 :
<span th:with="kor=90, eng=80"><!-- th:with="변수명=값,.. " -->
	<span th:text="|${kor} + ${eng} = ${kor+eng}|">변수는 ${}내에서만 유효. 산술연산 +-*/</span>
</span>
<br>
관계 연산 : <br>
<span th:text="3 >= 4"></span><br>
<span th:text="3 < 4"></span><br>
<span th:text="a >= b"></span><br>
<span th:text="a < b"></span><br>
<span th:text="3 >= 4"></span><br>
<span th:text="3 == 4"></span><br>
<span th:text="3 != 4"></span><br>
<span th:text="a == b"></span><br>
<span th:text="a != b"></span><br>
<hr>
조건연산(if, unless):
<span th:text="5 > 4?'크구나':'작네'">상항연산</span>
<br>
조건연산(true):
<span th:if="5 > 4">
	조건이 참일 때 수행(아니면 이부분출력되지않음)
</span>
<br>
<span th:unless="5 == 4">
	조건이 거짓일 때 수행
</span>
<br>
switch 조건문:
<div th:switch="${msg}">
	<b th:case="자바만세" th:text="|당연히 ${msg}|"></b>
	<i th:case="|타임리프 만세🤩|" th:text="|결국 ${msg}|"></i>
	<!-- 가운데 띄어쓰기가있으면 ||해줘야한다 -->
	<strong th:case="*">그 외 메시지구만🤔</strong>
</div>
<br>
상품 객체 출력 : 객체명.getter, 객체명['getter']<br>
<div th:text="${sangpum.code}"></div><!--여기서 code는 그냥코드가아닌 게터코드임을 잊지말자 -->
<div th:text="${sangpum['code']}"></div>
<div th:text="${sangpum.sang}"></div>
<div th:text="${sangpum.price}"></div>
<br>
객체 참조 기법 (th: object) : <br>
<div th:object="${sangpum}">
	<span th:text="*{code}">자식요소에서 *{필드명(정확힌 게터)}</span>
	<span th:text="*{sang}"></span>
	<span th:text="*{price}"></span>
	<span>[[*{price}]]</span>
	<span>[[*{['price']}]]</span>
</div>
<br>
<p th:text="${list[0]}"></p>
<p th:text="${list[1]}"></p>
반복 처리 : <br>
<table border="1">
	<tr>
	 <th>코드</th><th>품명</th><th>가격</th>
	</tr>
	<tr th:each="s:${list}">
		<td>[[${s.code}]]</td>
		<td>[[${s.sang}]]</td>
		<td>[[${s.price}]]</td>
	</tr>
</table>
</body>
</html>
이번엔 Gradle로 빌드도구를 바꿔쓴다.
Gradle은 추가등 변동사항이 생기면 반드시 REFRESH를 해줘야한다.

실습1
TestController.java
@Controller
@RequestMapping(value="thleaf")
public class TestController {
	@GetMapping("/ex1")
	public String abc1(Model model) {
		ItemDto dto = new ItemDto();
		dto.setId("ks1");
		dto.setName("마우스");
		dto.setPrice(5000);
		dto.setRegDate(LocalDate.now());

		model.addAttribute("dto", dto);

		return "show1";
	}
show1.html
<!DOCTYPE html>
<html xmlns:th="http://www.thymeleaf.org">
<head>
<meta charset="UTF-8">
<title>Insert title here</title>
</head>
<body>
<h2>🫐상품 자료 출력🫐</h2>
<table>
	<tr>
		<td>아이디</td>
		<td th:text="${dto.id}">ks0</td>
	</tr>
	<tr>
		<td>상품명</td>
		<td th:text="${dto.name}">표준제품</td>
	</tr>
	<tr>
		<td>가 격</td>
		<td th:text="${dto.price}">1000</td>
	</tr>
	<tr>
		<td>등록일</td>
		<td th:text="${dto.regDate}">2024-01-01</td>
	</tr>
	<tr>
		<td colspan="2" th:text="|가격은 ${dto.price}, 등록일은 ${dto.regDate}입니다|"></td>

	</tr>
</table>
</body>
</html>
실습2
컨트롤러
@GetMapping("/ex2")
	public ModelAndView abc2() {
		List<ItemDto> list = new ArrayList<ItemDto>();

		for(int i=1; i<=3; i++) {
			ItemDto dto = new ItemDto();
			dto.setId("ks"+i);
			dto.setName("신상품"+i);
			dto.setPrice(1000*i);
			dto.setRegDate(LocalDate.now());
			list.add(dto);
		}

		ModelAndView andView = new ModelAndView("show2");
		andView.addObject("dtos", list);
		return andView;
	}
출력화면
<h2>🍉상품 자료 여러개🍉</h2>
<table>
	<tr>
	  <th>인덱스</th><th>아이디</th><th>상품명</th><th>가격</th><th>등록일</th>
	</tr>
	<tr th:each="dto,status:${dtos}">
	 <td th:text="${status.index}"></td>
	 <td th:text="${dto.id}"></td>
	 <td th:text="${dto.name}"></td>
	 <td th:text="${dto.price}"></td>
	 <td th:text="${dto.regDate}"></td>
	</tr>
</table>
실습3
컨트롤러
@GetMapping("/ex3")
	public String abc3(Model model) {
		List<ItemDto> list = new ArrayList<ItemDto>();

		for(int i=1; i<=5; i++) {
			ItemDto dto = new ItemDto();
			dto.setId("ks"+i);
			dto.setName("신상품"+i);
			list.add(dto);
		}
		model.addAttribute("dtos", list);
		return "show3";
	}
출력화면
<h2>🍋상품 자료 여러개🍋</h2>
<h3>if, switch, each 연습</h3>
<table border="1" >
	<tr>
	  <th>인덱스</th><th>아이디</th><th>상품명</th>
	</tr>
	<tr th:each="dto,status:${dtos}">
	 <td th:if="${status.odd}" th:text="홀수"></td><!-- 참이면 홀수 -->
	 <td th:unless="${status.odd}" th:text="짝수"></td><!-- 거짓이면 짝수 -->
	 <td th:text="${dto.id}"></td>
	 <td th:text="${dto.name}"></td>
	</tr>
</table>
<br>
<table border="1" >
	<tr>
	  <th>인덱스</th><th>인덱스</th><th>인덱스</th>
	</tr>
	<tr th:each="dto,status:${dtos}">
	 <td th:text="${status.index}"></td>
	 <td th:text="${status.count}"></td>
	 <td th:if="${status.odd}" th:text="홀수"></td>
	 <td th:if="${status.even}" th:text="짝수"></td>
	</tr>
</table>
<br>
<table border="1" >
	<tr>
	  <th>인덱스</th><th>아이디</th><th>상품명</th>
	</tr>
	<tr th:each="dto,status:${dtos}">
	 <td th:switch="${status.even}">
	 	<span th:case=true>짝수</span>
	 	<span th:case=false>홀수</span>
	 </td>
	 <td th:text="${dto.id}"></td>
	 <td th:text="${dto.name}"></td>
	</tr>
</table>
<hr>
<h3>링크 처리</h3>
<a href="/thleaf/ex1">show1로 이동</a><br>
<a th:href="@{/thleaf/ex1}">show1로 이동</a><br>
<a th:href="@{https://www.naver.com}">naver로 이동</a><br>
<a th:href="@{/thleaf/ex4(param1='토요일',param2='일요일')}">show4 이동</a><br>
<!-- 타임리프 템플릿을 쓸때는 괄호안에 적어주는게 관행. -->
</body>
dto,status:${dtos}
dtos라는 변수에 있는 데이터를 dto라는 이름으로 하나씩 가져오고, 반복의 상태를 status라는 이름으로 사용할 수 있게 함.
status 객체의 속성 요약
| index | 반복문에서의 현재 항목의 인덱스 (0부터 시작) | 0, 1, 2 | 0, 1, 2 |
| count | 반복문에서의 현재 항목의 카운트 (1부터 시작) | 1, 2, 3 | 1, 2, 3 |
| odd | 인덱스가 홀수인 경우 true | true/false | true, false |
| even | 인덱스가 짝수인 경우 true | true/false | true, false |
전체소스코드는 깃허브 sprweb6,7 을 참고하자.
https://github.com/yoonah0327/spring_source
GitHub - yoonah0327/spring_source
Contribute to yoonah0327/spring_source development by creating an account on GitHub.
github.com
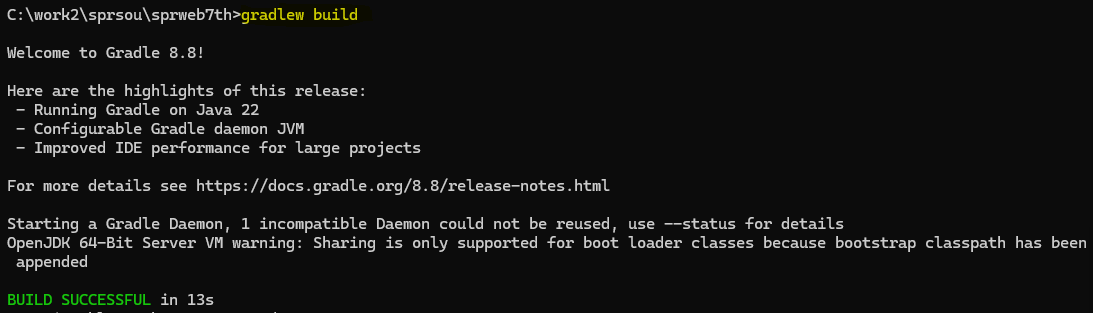
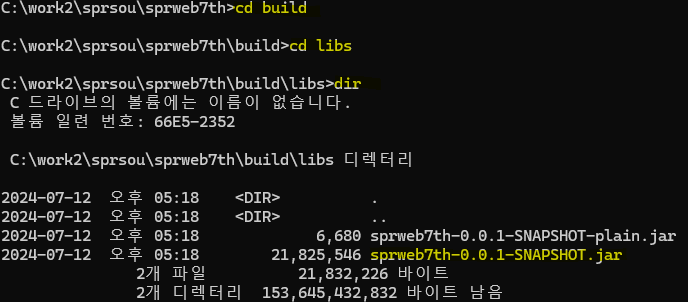
jar로 배포작업
참고 사이트
https://velog.io/@sians0209/Spring-.jar%EB%A1%9C-%EB%B0%B0%ED%8F%AC%ED%95%98%EA%B8%B0
프로젝트 경로찾기
sprweb7th까지 들어오기.

https://colabear754.tistory.com/90
[Spring Boot] application.properties와 application.yml의 차이점
목차 개요 Spring Boot 프로젝트에서는 일반적으로 프로젝트의 각종 설정을 application.properties 또는 application.yml 파일을 통해 하게된다. 기본적으로 Spring Initializr를 통해 Spring Boot 프로젝트를 생성하
colabear754.tistory.com
. https://gmlwjd9405.github.io/2018/12/21/template-engine.html
[Template Engine] 템플릿 엔진(Template Engine)이란 - Heee's Development Blog
Step by step goes a long way.
gmlwjd9405.github.io
[템블릿 엔진] 넌 뭐니?
업로드중..
velog.io
머스테치(Mustache)와 타임리프(Thymeleaf) 간단비교
머스테치와 타임리프는 모두 서버 사이드 템플릿 엔진으로서, 웹 애플리케이션에서 동적으로 HTML을 생성하는 데 사용됩니다. 이 두 템플릿 엔진은 유사한 목적을 가지고 있지만 몇 가지 차이가
velog.io